How to install a metal gasket? Installing a metal gasket might seem like a straightforward job; it has to be fitted properly for a leak-free seal. Whether using an automotive set or an industrial machine, or even in plumbing systems, the right way of installing a metal gasket is vital to retain its performance and give away costly failures. The guide walks through everything you must know–starting from selecting the right gasket for your purposes to assuring a sturdy installation. By the time you finish reading this article, you should feel confident to go step-by-step through the installation and avoid the common pitfalls that eventually lead to unwarranted repairs or downtime.
Understanding Gaskets and Their Importance

This chemical specialist ensures that the person’s living room will be filled with all the goods and services that come from the chemical reaction go through whatever the sealing joint joins. Gaskets are necessary in practically every industry to ensure system integrity of the handling apparatus to various chemicals, be it liquid or gaseous. Gaskets may be designated based on temperature, pressure, and chemical considerations. Proper selection and installation of gaskets will guarantee system performance, prevent leakage, and avoid expensive downtime.
What is a Metal Gasket?
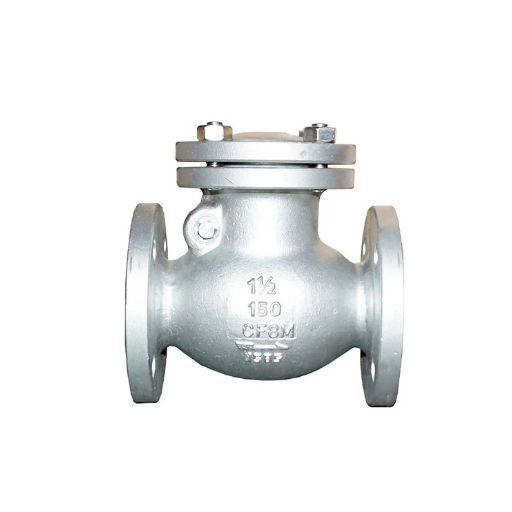
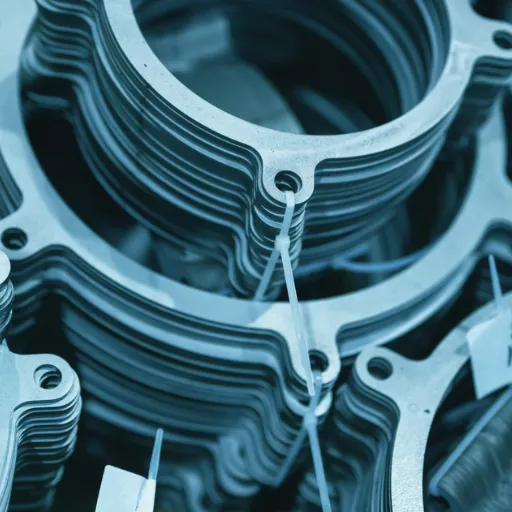
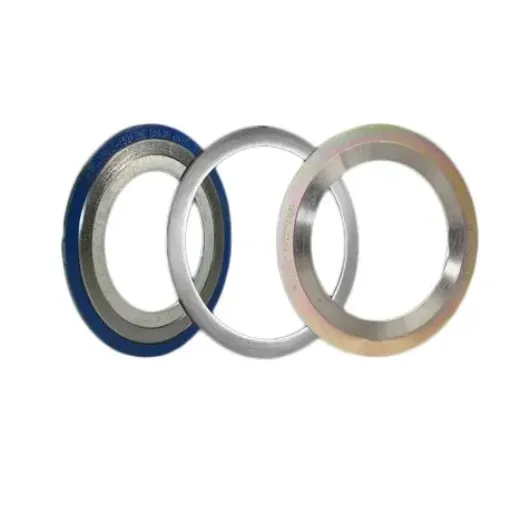
A metal gasket is basically a sealing element that is made of metal and creates a firm seal between two mating surfaces under high-pressure and temperature conditions. These gaskets find usage in demanding industrial applications, such as automotive, aerospace, and oil and gas sectors, where longevity and trustworthiness are the prime considerations. The metal gaskets can be made in various metals such as stainless steel, copper, or alloys, depending on the need of the system. They work excellent by slightly deforming under pressure to fill surface irregularities and provide a common leak-proof seal. These gaskets also stand against chemical, thermal, and mechanical stresses. Concerted efforts must be put in for their proper installation and maintenance so that being used for prolonged periods, they give the utmost performance.
Types of Gaskets: Metal vs. Rubber
Metal Gaskets
Generally formed from stainless steel, copper, or other metals and are suitable for such environments where there are huge pressures and temperatures; these gaskets can stand up well against chemical or mechanical aggressions. These are, therefore, understandably very popular with the industries needing strong performance for long periods.
Rubber Gaskets
Include varieties such as silicone, nitrile, or neoprene, which are flexible and adaptable enough to be classified for use in low-to-medium pressure systems such as plumbing and HVAC. Rubber types of gaskets resist water and some other chemicals and allow for easy installation.
The Role of Gaskets in Engine Performance
Gaskets are an extremely important element for the performance of an engine and securing seal between various engine components so as to not leak oil, coolant, etc., and maintain optimum compression in the combustion chambers. Gaskets, withstanding very high pressure, temperature variation, and chemical exposure, assure that the engine runs efficiently and with reliability. Gaskets, if installed and maintained properly, help reduce chances of leaks and mechanical failures, thus contributing a lot to the performance, longevity, and safety of automotive engines.
Preparing for Gasket Installation
- Clean All Surfaces: Mating surfaces should be clean, dry, and free of debris or residue left by a prior gasket. If needed, apply solvent or scrape.
- Examine the Components: Ascertain any presence of warping, cracks, or blemishes on the surface or surrounding components, which are to be installed with the gasket; upon detection, cut or repair accordingly.
- Choose the Right Gasket: Be sure to select a gasket compatible with your engine and application. Check your vehicle’s service manual for compatibility issues.
- Prepare Gasket: If sealant application is required, use the one recommended by the manufacturer. Apply it evenly, just a thin layer, so it would not block anything or create an improper seal.
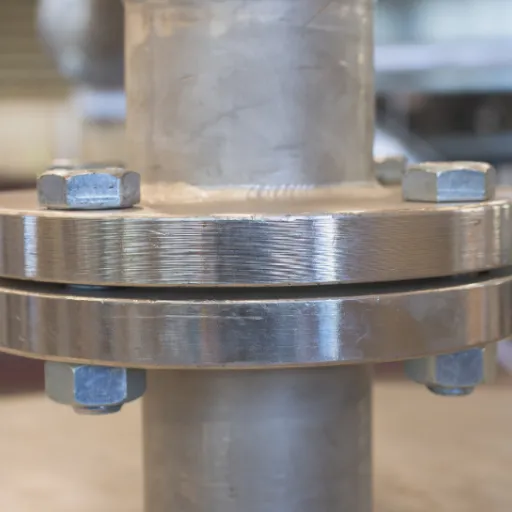
- Install the Gasket: Lay the gasket carefully, lining up all holes and edges with the components; do not have anything out of alignment as this could cause sealing issues or worse-a leak.
This step avoids any hassle in future checks upon the motor assembly. Use a calibrated torque wrench to tighten the bolts in the exact sequence and to the exact torque as per the service manual for a well pressured sealing.
Tools and Materials Needed
| Tool/Material | Purpose |
|---|---|
| Calibrated Torque Wrench | For tightening to standardized torque |
| Scraper or Gasket Remover | For removing old residue |
| Lint-free Cloth | For cleaning surfaces |
| Safety Gloves | For hand protection |
| Replacement Gasket | Prepared for your specific component |
| Service Manual | For proper torque specifications and patterns |
| Non-abrasive Cleaner | To ensure an appropriate finish on sealing surface |
Inspecting the Gasket Face
Before putting in the new gasket, it is better to give a thorough inspection to the gasket face for any damage, signs of wear, or warping that would compromise the seal. Scratches, gouges, or any non-flat surface that can affect the proper fitting can be looked for in the sealing face. A straight edge should be used to ensure flatness across the sealing surface, as even slight distortions may cause leaks. An appropriate step should be taken depending on the defect: resurface or replace the offending portion. A properly finished gasket face is critical to having a good, long-lasting seal.
Cleaning Surfaces for Optimal Seal
Cleaning surfaces contemplating a perfect seal entails first getting rid of any old gasket material, debris, or anything that could potentially affect a fresh surface; the best way to go about it is with a thin scraper or even a chisel or screwdriver, depending on the tools you have—and remember to be extremely careful not to scratch or mar the sealing surfaces. Next, wipe it down with a nice lint-free cloth soaked with an appropriate solvent. Brake cleaner or acetone will work well in this scenario. The solvent solutions remove oil, grease, fingerprint marks, or residues. The surfaces must be dry; any contaminants or moisture will enter the seal along the bonding process. Consider inspecting the area once more to confirm the surficial smoothness and absence of debris before assembly.
How to install a metal gasket: Step-by-Step Process
- Apply Gasket Sealant (If Required): Depending on the gasket type and manufacturer’s instructions, apply a thin, even layer of gasket sealant onto either or both of the cleaned surfaces. Do not apply a sealant if it is not recommended.
- Set the Gasket: Carefully set the gasket on the surface, making sure it is aligned perfectly with bolt holes and edges of the sealing area. In doing so, work to avoid stretching or misaligning the gasket.
- Install the Second Component: Align the second mating component over the prepared surface and gasket, confirming all bolt holes are properly aligned before clamping the pieces together.
- Insert Bolts and Hand-Tighten Them: Begin inserting bolts or fasteners and hand-tighten these to keep all components and gasket in position. This prevents shifting but allows adjustments.
- Torque the Bolts to Specification: Using the torque wrench, torque the bolts in a crisscross pattern or specified pattern to meet the recommended torque value. This action applies even pressure on the gasket so that it can’t leak or become damaged.
- Inspect the Seal: After full assembly, inspect the joint to ensure the gasket is seated properly with no gaps or misalignment visible.
- Testing for Leaks: Pressurize or conduct a fluid test, if applicable, to test the seal’s integrity. Repair any related issues quickly to obtain optimal performance.
Important: Pursue the guidelines through each step to achieve the best results and for warranty compliance.
Installing an Exhaust Manifold Gasket
The first step before installing an exhaust manifold gasket would be to make sure you have the right type of gasket for your vehicle by cross-checking the part number and specifications from the manufacturer. Clean and dry with no traces of dirt, or old gasket material, the mutually mating surfaces of the exhaust manifold and cylinder head using a gasket scraper or solvent if necessary. Check both surfaces for any warping or physical damage; such irregularities will hinder a proper seal. When needed, a thin film of high-temperature gasket sealer may be evenly applied, as specified by the gasket manufacturer. Carefully place the new gasket onto the bolt holes without overlapping it; it must rest perfectly flush. Place the bolts, tighten to torque values specified, and work on a crisscross or diagonal pattern so pressures are evenly distributed-unbalanced pressure may cause cracking or uneven sealing. Check the gasket to confirm proper alignment with no visible gaps or pinching after installation. A leak test must be carried out soon after, with the vehicle running either by listening or feeling for exhaust leaks around the gasket area; any potential leak should be addressed immediately by re-torquing bolts or promptly replacing the gasket. Always comply with the manufacturer’s recommendations for best performance and warranty protection.
Installing an Intake Manifold Gasket
Prior to installation of the intake manifold gasket, clean thoroughly the mating surfaces of the intake manifold and the cylinder head in order to remove any traces of old gasket, dirt, or oily residue. If the manufacturer recommends it, apply a thin layer of gasket sealant for assurance of a proper seal. Position the new gasket carefully onto the cylinder head, ensuring the bolt holes and ports align with it. Attach the intake manifold, insert the bolts, and hand-tighten to avoid misalignment. Afterward, refer to the vehicle’s service manual on the proper bolt tightening sequence and torque specifications. Recheck the assembly for alignment and ensure there are no gaps or areas where the gasket might be pinched. Reinstall any components that were removed during gasket outfitting, then start the engine to check for vacuum or coolant leaks. Any detected leaks should be addressed immediately by torquing the bolts again or joining the gasket surface correctly as needed. To ensure proper installation and to avoid operating issues, always follow the manufacturer’s instructions.
Gasket Installation Tips
✓ Clean All Surfaces
The mating surfaces should be thoroughly cleaned and kept free of dirt, grime, or remnants of gasket material so as not to hamper sealing.
✓ Use the Correct Gasket
One must always make sure that the gasket given to the manufacturer is used in the application, or else there could be issues with compatibility.
✓ Apply Sealant If Needed
Check the manufacturer’s instructions to determine if sealant is to be used, and if so, then use only the approved type and the correct amount.
✓ Respect Torque Specifications
Tighten the bolts according to the sequence and torque values indicated in the manufacturers’ instructions to avoid uneven compression and consequent leakage.
✓ Check for Fit Issues
Check to ensure proper alignment of the gasket and fitment without gaps so that folds and pinches cannot form.
✓ Leak Testing
Start the engine or put the system into operation while testing the installation for any signs of leakage, and rectify any such instance without delay.
Common Mistakes to Avoid
- Not cleaning the surfaces properly before the installation of the gasket
- Using an old or slightly damaged gasket, compromising the sealing
- Over-tightening or tightening the bolts unevenly, deforming the gasket
- Neglecting manufacturer’s recommendations for lubrication during installation
- Failing to test for leaks after installation
Using RTV Sealant: When and How
RTV sealant is a versatile adhesive used for dependable leak-proof seals in mechanical and automotive applications. This sealant is especially applied whenever the usual gasket is insufficient, or a custom seal is required for some unusual surface.
RTV Application Procedure:
- Clean plates of all dirt and dust; an oily surface should never be present
- Apply the sealant in a continuous bead on the area intended
- Don’t put any excess beads since it will get squeezed onto places where it loses functionality
- Allow the seal to cure as the manufacturer has stipulated before exposing to pressure or assembling the components
Post-Installation Procedures

| Check Type | Procedure |
|---|---|
| Visual Inspection | Check for uniformity of the sealant bead. Make sure there are no gaps, bubbles, or cracks present. Ensure there is no accidental spill into critical areas. |
| Adhesion Test | Slightly peel a small and hidden section of the seal and confirm that it sticks to the two surfaces properly. |
| Functional Test | Go ahead with operational pressures or temperatures, meeting the gradual working conditions, if applicable, or check whether the sealant sustains the required conditions. |
| Clean-Up | Remove any excess sealant from around the surface without damaging the applied seal. |
Inspecting for Leaks
For effective leak checking, the seal should be thoroughly checked for any visible gaps, cracks, or inconsistencies in application. The use of a flashlight is recommended to shine into hard-to-reach places and check for proper coverage. Introduce a small amount of water or air pressure, according to the system, to test any weaknesses. Water or air escaping would point at having a leaking spot. Mark the leak, if found, and reapply the sealant, making sure to do that with thorough adherence and proper coverage. If required, repeat until this is done, and the seal can be declared sound with no leaks.
Testing Engine Performance
Testing engine performance involves those major ones like output, efficiency, and reliability under various operating conditions. Begin with a visual inspection of the engine for any damage or leaks or any defects that could jeopardize performance potentials. Then, measure compression, fuel pressure, and ignition timing using engine diagnostics equipment to verify that they conform to manufacturer specifications. Run the engine for performance in terms of acceleration, smoothness, and power delivery. Monitor exhaust emissions for standards compliance and if necessary, point out the problem in the combustion process. All the data should be recorded, analysis performed on the anomalies, if any, followed by adjustments, or repairs required to attain optimal performance from the engine.
Maintaining Your Gasket Over Time
One regular maintenance schedule can ensure the longevity and reliability of your gasket. Start with an inspection: check your gasket for wear or degradation, which might result in inferior sealing. Common degradations include cracks, corrosion, and deformations. Clean the mating surfaces so that no particles come in between and cause early wear. Leaks should also be watched for since these are signs of gasket failure and thus need immediate attention. Strict adherence to manufacturer torque specs during installation is necessary to avert damage to the gasket by overtightening. The gasket must be replaced when wear is visible to keep the engine running optimally and prevent the onset of different conditions.
References
-
Gasket Installation – Gasket Resources: Offers detailed steps for preparing and installing gaskets, including cleaning and lubricating components.
-
How To Properly Install A Gasket – Sealing Devices: Provides a comprehensive guide on centering and compressing gaskets uniformly.
-
Installing a VCR Metal Gasket Face Seal Fitting – Swagelok: A technical video guide for installing VCR metal gasket face seal fittings.
Frequently Asked Questions (FAQs)
What is the best way to install a metal head gasket?
The best method of installation of metal head gaskets requires several steps to obtain the proper seal. First, clean and degrease the surface area of the parts where the gaskets will sit, always removing any traces of trash or dirt from previous gaskets. The metal gasket should be lightly lubed (not bindingly coated) so it can compress evenly during installation. When setting down the gasket, make sure the hole alignment matches all the way with the bolt holes. Following preload specs’ recommendations allows the even distribution of pressure over the gasket. You should consult a professional if you feel confused about one step or another in the process.
What are common causes of gasket failures?
There are many reasons why gaskets fail, such as improper gasket installation or selecting the wrong gasket for the job. Overheating leads to deformation of metal gaskets, while in other cases, the gasket might be simply not well seated because of low preload. Incompatible lubricants could contribute to failure, and so can lack of proper curing time for sealants such as Permatex or shellac. Regular maintenance and inspections identify factors that can lead to gasket failure. Make sure you are using paper gaskets when it is appropriate- as they might be the better option for some applications.
What are some gasket installation tips for exhaust manifold gaskets?
When fitting exhaust manifold gaskets, make sure the surfaces are clean and free of old gasket material. Often, a thin coat of high-temperature sealant including shellac or an aviation sealant on the gasket can provide a good seal. After installing a gasket, torque bolts in a crisscross pattern so that pressure is evenly distributed on the gasket surface and the manifold does not warp. Let the sealant cure as per instructions. Check for leaks periodically after installation, as it gives you time to fix issues when they arise. Practice these tips diligently-often, these can go a long way toward improving the life of your exhaust manifold gaskets.
How do I properly install an intake manifold gasket?
To do an intake manifold gasket replacement, start by cleaning the surfaces on the engine and remove any remnants of old gasket. A thin coat of lubricant or sealant should be applied on both sides of the gasket to allow it to fully compress once installed. The gasket has to be fitted very carefully so that all the holes align perfectly with the manifold and the engine block. The bolts have to be tightened following the sequence given by the manufacturer so as to maintain an even pressure on the gasket. Once installed, keep watching for any leaks or symptoms of performance issues, tackles those as soon as you can.
What is the significance of using a metal gasket in automotive applications?
These were metal gaskets for automotive applications because of their strength and resistance to high temperatures and high pressure. They thus provide an incomplete sealing of any kind, which is vital for the proper operation of the engine and for preventing leakage. Metal gaskets can sustain tougher conditions compared with paper gaskets; hence they are suitable for application as head gaskets and exhaust gaskets. Improper installation of gaskets negates all the benefits. Besides, metal gaskets in some applications can be recycled if not damaged. Always consult with an expert for proper advice on the ideal gasket for your application.
Key Takeaways
Proper metal gasket installation requires careful surface preparation, correct torque specifications, and thorough post-installation testing. Following manufacturer guidelines and maintaining proper cleanliness throughout the process ensures a reliable, leak-free seal that will provide optimal performance and longevity.