The notion of cutting metal gasket material may be intimidating to the uninitiated, whereas the ready application of the appropriate tool and technique turns the task efficient and precise. Whether your pastime of choice involves a fair bit of DIY work, or professional work entails a few custom gaskets here and there, a thorough “how to cut metal gasket material” ensures attainment of a tight seal and dependable seal in a variety of applications. This guide will take you step by step through the procedure, offering useful tips and insights to help make sure you succeed. From selecting the proper tools to paring the material to a bare minimum and making the cleanest cuts, by the time you’re through with this guide, you’ll be proficient in making high-grade gaskets.
Understanding Gasket Materials

Gasket materials are used to seal between two surfaces so that liquids or gases cannot leak out. The common gasket materials are rubber, cork, metal, and composite materials. Each type is selected based on the environment in which it will be installed, such as temperature resistance, pressure tolerance, and the chemicals it can withstand. For instance, an elastomeric material is flexible and fit for low to medium pressures, whereas metal would provide better mechanical strength in high-pressure and/or high-temperature environments. Gasket material selection is critical in guaranteeing a strong seal that will last through time.
Types of Gasket Material
The choice of gasket materials depends on application parameters such as temperature, pressure, and chemical compatibility:
- Rubber gaskets (neoprene or silicone) – provide versatility for low- to medium-pressure and -temperature work with flexibility and resilience
- Cork – frequently used in sealing applications where compressibility under low bolt loads is required
- Metal gaskets (stainless steel) – considered for high-pressure and high-temperature uses where longevity is an issue
- Composite materials – offer combined properties tailored to specific-spectrum needs
The choice of the material hence always depends on providing a lasting and reliable seal in each industry.
Properties of Gasket Paper
Gasket paper is recognized as one of the most adaptable sealing materials that enjoy attributes like durability, flexibility, and reliability. Mostly it is made from cellulose or nitrile rubber blends. It serves varied uses, e.g. sealing oil or water or chemical substances. It imparts good compressibility, adapting to irregular surfaces with the gasket ensuring a seal even under light bolt loads. On the other hand, gasket paper is pretty easy to cut and manufacture, thus making it a convenient option for custom or intricate gasket design. Furthermore, its resistance to high temperatures and pressures makes it suitable in automotive, industrial, and plumbing applications.
Choosing the Right Material for Your Gasket
By considering the properties of the material in relation to needs, one is assured of a proper and dependable seal for his or her application.
Tools and Techniques for Cutting Gaskets
Gasket cutting requires the correct tools and methods for precision and speed. Standard tools consist of utility knives, gasket cutters, and precision die-cutting machines. A utility knife may be sufficient if the shape is uncomplicated, but rotary cutters or other specialty tools such as hole punches can be required for more complex cuts. Precision die-cutting machines are best suited for either high volume or intricate patterns to yield consistent results.
For hand cutting, use a template to cut accurately and keep the blades sharp for clean edges. Scissors or shears can be used with softer materials, but beware of deformation. A properly measured and marked gasket, using appropriate cutting methods, will result in the best gasket that fits well and functions as intended.
⚠️ Safety First: Gloves and general safety precautions when handling sharp tools are highly recommended.
Essential Cutting Tools: Cutters and Die Cutters
Hand Cutters
- Utility knives
- Rotary cutters
- Adaptive for adjustments
- Suitable for intricate forms
Die Cutters
- Precision machinery
- High precision & repeatability
- Mass production capability
- Ideal for rigid materials
With the right cutter or die cutter, a manufacturer ends up ensuring clean edges, accurate dimensions, and a fast process-unity, the basis of good gasket performance.
How to Cut a Gasket: Step-by-Step Guide
Complete Cutting Process
- 1
Choose the material depending on the operating temperature, pressure, and chemical resistance - 2
Create a precise template or trace the gasket outline onto the material using a marker or pencil - 3
Use a utility knife, gasket cutter, or die cutter depending upon the thickness of the material - 4
Use hole punches or fine cutting tools for any holes or intricate details - 5
Check the gasket for any sharp edges and confirm proper dimensions - 6
Clean the gasket and reverse-fit test it before installation to verify compatibility
Best Practices for Cutting Round Gaskets
When cutting round gaskets, first select the type and thickness of material as indicated by the application’s specification. Clean and dry off the surface on which the gasket is to be installed so as to prevent contamination that could compromise the proper sealing.
💡 Pro Tip: Mark the dimensions using very accurate measuring instruments and always cross-check measurements twice to avoid errors.
Cut so it has clean edges and the exact shape by using sharp tools well-maintained and suitable for that material. After cutting, check for the evenness of the gasket and smooth edges and whether it matches the outline. Then, go ahead with the test-fitting of the gasket within the proposed place to assess all compatibility and functionality before installation.
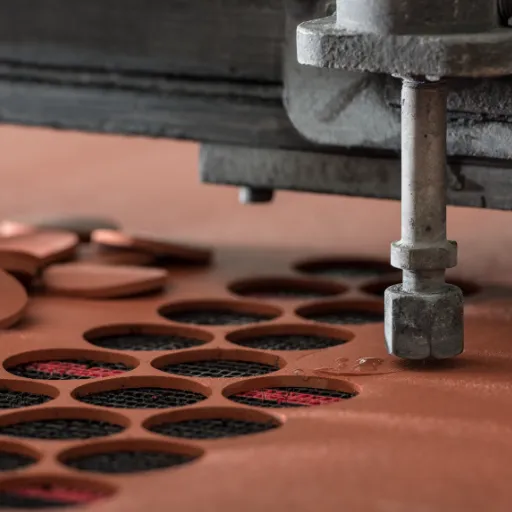
Creating Hole Patterns in Gasket Material
To produce accurate hole patterns in the gasket material, mark the hole locations with a template or measuring tool, thus ensuring the accuracy of the marking. Use the correct sized hole punch or cutting tool for the hole diameter you want. Once the gasket material is placed on a flat, stable surface, ensure even pressure so the holes are cut finely and accurately. Always double-check the pattern alignment with the original template or with the part that created the pattern before installation.
Drilling Bolt Holes in Gaskets
Drilling bolt holes in gaskets requires accurate execution so that it can fit properly and seal well. Begin by securing the gasket material on a flat surface to prevent its displacement during the drilling operation. Use the proper drill bit in relation to the size of the bolts, thereby obtaining clean, well-formed holes.
- Always mark the hole locations clearly before beginning work
- Resort to templates or take very careful measurements
- Maintain constant pressure and smooth control during drilling
- Prevent the formation of bumpy edges or damage to the gasket
- Check holes against the original template after drilling
Techniques for Making Holes in Gasket Material
Align and test-fit the gasket after holes are made to double-check the accuracy of the holes vis-a-vis installation.
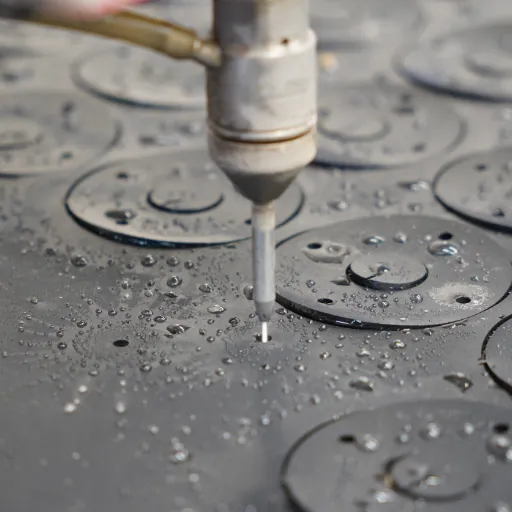
Using a Machinist Approach for Precision Cutting
The precision-cut machining approach utilizes cutting-edge tools that may include CNC machines, lathes, or precision cutters to achieve precise dimensions and produce smooth edges. Being tools that are mainly suitable for relatively harder materials or for processes where very great accuracy is required, such tools can be used by an experienced machinist, or in a well-equipped shop.
Machinist Process Steps:
- Measure and mark with extreme precision using calipers or micrometers
- Clamp the workpiece firmly to prevent shake or movement during cutting
- Select the correct cutter for the work-material
- Set machine feeding speed or feed rate according to cutter speed
- Keep cutter cool enough to prevent chipping
- Carefully inspect the workpiece after cutting
This way, a good finish on the job and fewer errors are assured, and so this is the preferred work system in a professional application.
Finalizing Your Gasket

The gasket has to be cleaned nimbly after the cut to eliminate debris or residue. Imperfections are to be checked, including rough edges, for unevenness or any possible tears. It can then be trimmed or smoothed out as needed. Now, the final dimension has to be checked against specifications to make sure the gasket fits perfectly. Keep this finished gasket in a stain-free, dry place till it is required for use.
Inspecting the Cut Gasket for Quality
Quality Inspection Checklist:
- Edge Quality: Check for smoothness and uniformity – jagged edges may defeat the gasket’s purpose
- Dimensional Accuracy: Verify dimensions against original specifications for exact fit
- Material Integrity: Inspect for cracks or deformations that may affect sealing efficacy
- Thickness Uniformity: Ensure uniform thickness throughout – differences could mean leaks or improper sealing
If it passes inspection, then the gasket can be confidently used in its appropriate application.
Assembling and Installing the Gasket
Installation Steps:
- Make sure the mating surfaces are clean and free from debris, old gasket materials, or contaminants
- Place the gasket carefully by aligning it to the bolt holes and relevant features
- Apply adhesive or sealant if required – use a light, uniform coat as per manufacturer directions
- Apply the mated component or flange onto the gasket, ensuring proper alignment
- Tighten bolts carefully alternating in a crisscross style for even pressure distribution
- Check for visible gaps or uneven areas to confirm tight and perfect sealing
Maintaining Gaskets for Longevity
In your aim to maintain the longevity of gaskets, it is important to implement a routine inspection and maintenance schedule. Check the gaskets for signs of deterioration, such as cracks, deformation, or material degradation, and replace them as necessary to avert any failure.
Surface Preparation
Keep sealing surfaces clean and debris-free
Storage Conditions
Store in cool, dry places away from sunlight
Material Compatibility
Use proper gasket type for operating conditions
Use of these practices will increase the lifespan of gaskets and guarantee dependable operation over time.
Frequently Asked Questions (FAQs)
📚 References
Triangle Fluid Controls: This source discusses common gasket cutting processes and tools, including utility knives, scissors, and battery-operated devices. Read more here.
SAU Community Forum: This forum thread explores practical tools like snips, holesaws, and drill bits for cutting manifold gasket sheets, along with tips for achieving clean cuts. Check it out here.
Sealing Devices Blog: This article explains the die-cutting method, which uses predesigned dies to cut gasket materials into specific shapes, offering precision and efficiency. Learn more here.
🎯 Conclusion
Mastering gasket cutting transforms what seems like a complex task into a manageable, precise process. With the right tools, techniques, and attention to detail, you can create professional-quality gaskets that ensure reliable sealing for any application. Remember: proper material selection, accurate measurements, sharp tools, and quality inspection are the keys to success.